There are bound to be instances when the sun refuses to shine, the wind declines to blow, and your batteries are running on fumes. You may find yourself with no other option than to resort to your fossil fuel-powered generator to recharge your batteries.
As many already comprehend, there exists no costlier method for battery charging than employing a 120/240 volt 60hz (or 230 volt 50hz) AC generator powered by fossil fuels.
There exist three techniques to replenish your battery bank, ranked from the most to the least efficient (which also means the most kWh per dollar or liter of fossil fuel expended).
The ideal scenario would be having sufficient solar, wind, or micro-hydro power (though that may seem like a distant dream in certain climatic conditions). The runner-up would be a DC generator, constructed from a fossil fuel engine and a 3-phase alternator, rectified to DC. Resorting to a readily available or industrial 120/240 volt 60hz (or 230 volt 50hz) fossil fuel generator takes the last spot.
Making your electricity with a gas, propane, or diesel generator can cost anywhere from $2.50 to $5.00 per kilowatt hour compared to the $.05 to $.60 per kilowatt hour most utilities charge. It is horribly expensive and environmentally a disaster. Most fuel-powered generators have no or very little emissions controls and are made to wear out in a matter of months when used to charge batteries in an off-grid power system.
Below are the steps to charging your batteries with a generator while using as little fuel as possible:
STEP 1: Bulk charge at 10% of the battery bank”s C20 rate
The first step in setting up your system to charge batteries efficiently is to program your inverter/battery charger to charge at 10% of the battery bank’s C20 AH rating.
This sounds complicated but it is not. What is a C20 amp hour rating?
Consult your battery manufacturer’s literature for the C20 amp hour (AH) rating.
For example:
Trojan’s L16s have a C20 amp hour rating of 370 AH at 6 volts.
If you were to take four of these L16s and place them in series you would now have a 24-volt battery bank rated at 370 amp hours.
Simply take the C20 AH rating and multiply it by 10% or .10. This is your bulk charge current setting.
In the above example, you should try to put 37 amps (370 multiplied by 10%) at 24 volts into your battery bank. This would require about 880 to 1110 watts depending on the actual battery voltage.
While some manufacturers allow up to 15%, they are usually referring to the C3 AH rating.
To get the most “bang for your buck” try your best to achieve the 10% of the bank’s AH rating. There will be times when this is not possible such as having too small of a generator or too small of a charger. You can charge at a lower current, it just won’t be as efficient.
If you charge with more than 10% of C20, you risk damaging the batteries due to overheating and gassing.
Let’s try another example:
This time we have sixteen Trojan T105s (225 AH @ 6 volts) wired in series and parallel to make a 48-volt battery bank. Two banks of eight batteries are paralleled to make 450 amp hours (C20) at 48 volts. This is a pretty common battery bank and is shown in the picture below…
In this example, it is best to set your inverter/charger to bulk charge at 45 amps (450 amp hours multiplied by 10%). Forty-five amps is approximately 2160 to 2700 watts depending on the real voltage of the battery bank.
Even if you have a much larger battery charger/generator, 45 amps are the target charge rate for this particular battery bank. Any less will result in excess generator run time and fuel consumption, any more can result in damage to your batteries.
STEP 2: Program the correct bulk voltage into the inverter/charger
Consult your battery manufacturer for the correct bulk voltage setting. Next, examine your inverter/charger’s manual to learn how to program the bulk voltage.
You need to be careful here as some manufacturers list:
- the bulk voltage per cell
- the bulk voltage per battery
- the absorption voltage (same thing as bulk voltage)
- the bulk/absorption voltage (same thing as bulk voltage)
- the bulk voltage as a range (i.e. 2.35-2.45 volts per cell)
- the daily charge voltage (same thing as bulk voltage)
All of the above terms like absorption, daily charge, and bulk voltage are all referring to the bulk voltage setting.
If your bulk voltage is listed per cell, think of each cell as being two volts.
- a 6-volt battery or battery bank has three cells
- an 8-volt battery or battery bank has four cells
- a 12-volt battery or battery bank has six cells
- a 24-volt battery or battery bank has twelve cells
- a 48-volt battery or battery bank has twenty-four cells
Once you know how many cells you have simply multiply the volts per cell by the number of cells you have. If your battery bank is 48 volts you know it will be made up of 24 cells.
For our first example, we have 4 Trojan L16s. Trojan lists the bulk/absorption voltage as 2.45 volts per cell.
As we have a 24-volt battery bank we simply multiply 2.45 by 12 to get a bulk voltage of 29.4 volts.
Let’s try our other example:
In this battery bank, we have sixteen Trojan T105s (225 AH @ 6 volts) wired in series and parallel to make a 48-volt battery bank. Two banks of eight batteries are paralleled to make 48 volts at 450 amp hours (C20)
. According to Trojan, the best bulk voltage is 58.8 volts as seen below…
In the above diagram, we know the recommended bulk voltage is 2.45 volts per cell.
As it is a 48-volt battery bank we simply multiply the cell voltage by 24 to get 58.8 volts.
What is bulk charging?
Bulk charging is when you apply a predetermined amount of current (10% of C20) to your batteries until a specific voltage is reached. This specific voltage is known as the bulk voltage. If your battery bank is low all of the charging capability (amps) will go into the batteries. As the batteries begin to fill up, the voltage will rise until the bulk voltage is reached.
As soon as the bulk voltage is reached, the absorption charge begins. The absorption charge gradually reduces the current while holding the bulk voltage steady until the batteries are full. Once the batteries are full, the batteries can be float charged.
If you are using solar, wind, or micro hydro to charge your batteries, the three-stage charging is great, but if you are using your generator, you SHOULD only be performing a bulk charge.
Remember our goal is to charge our batteries but use as little fuel as possible. Use the generator to keep the batteries from going dead and use the solar, wind, or hydro to top off the batteries later.
STEP 3: Program the absorption charge time setting on your inverter/charger
Although this step is not necessary we must discuss it. Normally we would use the absorption charge to add the extra 20% to your battery bank but to save fuel we will not.
But most inverters/chargers require a time setting for the bulk charge program. The standard setting would be 4 hours. ‘This is a good backup in case your automatic generator shut down (from STEP 4) malfunctions. It will take about 4 hours (if using 10% of C20) to bring your bank to a full state of charge once the bulk voltage is reached.
STEP 4: Design a system that will shut down the generator once bulk voltage is reached.
The bulk charge (when done correctly as shown above) will bring your battery bank to 80% state of charge (SOC). Using your generator for anything but a bulk charge is very inefficient, wasting fuel. You can complete the absorption charge, and float charge if you wish to add the extra 20% to your batteries but it is a waste of fuel.
It would be better to use your generator as a bulk charger and your solar, wind, or micro hydro to bring the batteries to 100% SOC.
Most high-end inverter/chargers or charge controllers have programmable relay drivers that can stop your generator once the bulk voltage is reached. Refer to your inverter/charger, charge controller, and generator’s owner’s manuals to learn how to set this up.
If you follow the steps above you can get the most energy input for the least amount of fuel.
Here are a few more suggestions when using a Gen set as your backup battery charger.
MAKE SURE YOUR INVERTER/CHARGER HAS A REMOTE BATTERY TEMPERATURE SENSOR
This is extremely important. As a battery’s temperature changes, so does the voltage required to charge it. Cold batteries need a higher bulk voltage and warm batteries must use a lower bulk voltage. You cannot babysit your batteries and charger to make changes with temperature swings. Temperatures change many times a day inside a battery depending on ambient temperature, how hard the battery is working, and how many amps are going in or coming out. Install the temperature sensor below the electrolyte level and on one of the batteries in the middle of the bank.
Do not buy a portable generator from Home Depot, Walmart, etc…
Inexpensive generators that can be purchased at your local big box store are great for the camping enthusiast, carpenter, and RV dry camper but they are a horrible waste of money and fuel for the off-grid homesteader. We all have made this mistake.
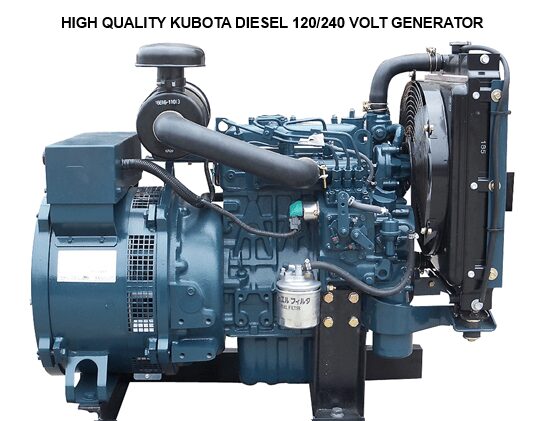
Instead, spend the money and buy an industrial, water-cooled, low rpm (1800 rpm, 1200 rpm, 900 rpm) generator like Kubota, Onan, John Deere, etc. They cost a lot more money but will last your entire lifetime if maintained compared to anywhere from 6 months to a couple of years with a cheap 3600 rpm air-cooled gen-set.
Always perform maintenance on your generator yourself.
High-quality generators are expensive. Repairs and extra parts are also very expensive. Doing your maintenance is always preferable to shipping your generator out for repairs or paying someone to repair on-site. If you can make minor repairs and perform basic maintenance yourself, you will be able to catch problems before they become a big deal and make sure the repairs are done right.
You are now living the independent “off-grid dream” and it is time to become as self-sufficient as possible.
Your generator’s manufacturer will recommend what maintenance needs to be done and how often. However, they never dreamed you would be abusing their gen-set like you are. In the “real world”, a generator is simply idling waiting for someone to start a power tool, light, or heater.
In your world, your generator is working like a dog and often producing as much power as it was designed to for hours at a time with no break. If you are abusing your gen-set you NEED to perform maintenance even more than the manufacturers recommend. If you keep your oil super clean and keep your air filter super clean, your generator set will last longer and use less fuel. Engine oil is inexpensive compared to the extra cost of fuel, extra repairs, and the cost of replacing your generator set.
-
REMEMBER IF YOU ARE GOING TO USE A 120/240 VOLT AC SINGLE-PHASE GENERATOR TO SUPPLEMENT YOUR RENEWABLE ENERGY SYSTEM, SPEND THE MONEY THE FIRST TIME AND BUY A HIGH-QUALITY, INDUSTRIAL GENERATOR.
DO NOT BE FOOLED LIKE 99% OF US INTO BUYING A CHEAP WALMART, HOME DEPOT TYPE PORTABLE GENERATOR.
YOU WILL ALWAYS REGRET IT UNLESS YOU ONLY NEED IT LESS THAN 20 HOURS PER YEAR.
Enough said.